Seamlessly Connect Your Webflow Site to a CRM: A Comprehensive Guide to Integration
Seamlessly Connect Your Webflow Site to a CRM: A Comprehensive Guide to Integration
In today’s digital landscape, having a stunning website is just the first step. To truly thrive, you need a system that captures leads, nurtures relationships, and converts prospects into loyal customers. This is where the powerful combination of Webflow and a Customer Relationship Management (CRM) system comes into play. This guide will delve deep into CRM integration with Webflow, providing you with everything you need to know to create a streamlined and effective workflow.
Why Integrate Webflow with a CRM? The Core Benefits
Before we jump into the how-to, let’s explore the “why.” Integrating your Webflow site with a CRM offers a plethora of benefits that can significantly impact your business’s growth and efficiency. Here are some of the core advantages:
- Centralized Data Management: A CRM acts as a central hub for all your customer data. When integrated with Webflow, every form submission, purchase, and interaction on your website automatically syncs with your CRM, eliminating the need for manual data entry and reducing the risk of errors.
- Improved Lead Generation and Qualification: Webflow’s forms become powerful lead generation tools. As visitors fill out forms, their information is instantly captured and categorized within your CRM. This allows you to quickly identify and qualify leads based on their behavior and interests.
- Enhanced Sales and Marketing Automation: Integration unlocks the potential for automation. You can set up automated email sequences, personalized content delivery, and targeted marketing campaigns based on user behavior on your Webflow site.
- Personalized Customer Experiences: With a CRM, you gain a 360-degree view of your customers. This allows you to personalize their website experience, tailor your messaging, and provide exceptional customer service, leading to increased customer satisfaction and loyalty.
- Increased Efficiency and Productivity: Automating data transfer and streamlining workflows frees up your team’s time, allowing them to focus on more strategic tasks, such as building relationships and closing deals.
- Data-Driven Decision Making: CRM integration provides valuable insights into your website’s performance and your customer’s behavior. You can track key metrics, analyze trends, and make data-driven decisions to optimize your website, marketing efforts, and sales strategies.
Choosing the Right CRM for Your Webflow Integration
The market is saturated with CRM solutions, each with its unique features, pricing, and capabilities. Selecting the right CRM for your Webflow integration is crucial for ensuring a seamless and effective workflow. Here are some of the most popular and well-suited CRM options for Webflow:
- HubSpot: HubSpot is a leading CRM platform known for its comprehensive features, user-friendly interface, and robust marketing automation capabilities. It offers a free plan that’s ideal for small businesses and startups, as well as paid plans for more advanced features. HubSpot integrates seamlessly with Webflow through various methods, including native integrations and third-party apps.
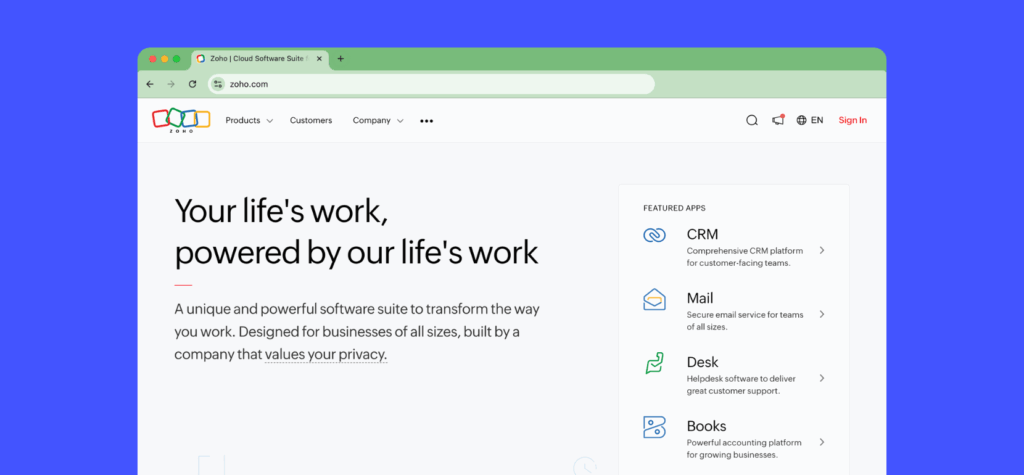
- Zoho CRM: Zoho CRM is another popular option that offers a wide range of features at a competitive price point. It’s known for its customization options and ability to integrate with various third-party applications. Zoho CRM integrates with Webflow through Zapier and other integration platforms.
- Salesforce: Salesforce is a powerful and feature-rich CRM platform designed for larger businesses. It offers a comprehensive suite of tools for sales, marketing, and customer service. Salesforce integrates with Webflow through third-party apps and custom integrations.
- Pipedrive: Pipedrive is a sales-focused CRM that’s known for its user-friendly interface and visual pipeline management. It’s a great option for businesses that prioritize sales and deal tracking. Pipedrive integrates with Webflow through Zapier and other integration platforms.
- ActiveCampaign: While primarily known as an email marketing platform, ActiveCampaign also offers robust CRM capabilities. It’s a great choice for businesses that want to combine marketing automation and CRM in one platform. ActiveCampaign integrates with Webflow through Zapier and other integration platforms.
When choosing a CRM, consider the following factors:
- Your business needs: Determine your specific requirements, such as sales, marketing, customer service, and reporting needs.
- Your budget: CRM platforms vary in price, from free plans to enterprise-level pricing.
- Ease of use: Choose a CRM with a user-friendly interface that your team can easily adopt.
- Integration capabilities: Ensure that the CRM integrates seamlessly with Webflow and other tools you use.
- Scalability: Select a CRM that can grow with your business.
Methods for Integrating Webflow with a CRM
There are several methods for integrating Webflow with a CRM, each with its own advantages and disadvantages. Here are the most common approaches:
1. Native Integrations (Limited Availability)
Some CRM platforms offer native integrations with Webflow. This means that the integration is built directly into the CRM and Webflow platforms, making it the easiest and most seamless option. However, native integrations are not available for all CRM platforms. Check the documentation of your chosen CRM to see if a native integration is available.
2. Third-Party Integration Platforms (Zapier, Make.com (formerly Integromat))
Third-party integration platforms like Zapier and Make.com (formerly Integromat) are the most versatile and widely used methods for integrating Webflow with a CRM. These platforms act as a bridge between Webflow and your CRM, allowing you to connect the two platforms even if they don’t have native integrations. They work by automating workflows, or “Zaps” or “Scenarios”, that trigger actions in your CRM based on events in your Webflow site, such as form submissions.
Zapier: Zapier is a user-friendly platform that allows you to create automated workflows between Webflow and your CRM. It offers a wide range of pre-built integrations, or “Zaps,” that you can use to connect the two platforms. You can also customize your Zaps to meet your specific needs.
Make.com (formerly Integromat): Make.com (formerly Integromat) is a more advanced integration platform that offers greater flexibility and customization options. It allows you to create complex workflows with multiple steps and conditions. Make.com (formerly Integromat) is a good option for businesses with more complex integration needs.
How it Works (Zapier as an example):
- Choose a Trigger: The first step is to select a trigger. This is the event that will initiate the automated workflow. For example, a trigger could be a new form submission in Webflow.
- Choose an Action: The next step is to choose an action. This is the action that will be performed in your CRM when the trigger occurs. For example, an action could be to create a new contact in your CRM.
- Map the Fields: You will then need to map the fields from your Webflow form to the corresponding fields in your CRM. This ensures that the data from your form is transferred correctly to your CRM.
- Test and Activate: Finally, test your Zap to make sure it’s working correctly and then activate it.
Advantages:
- Versatility: Works with a wide range of CRM platforms.
- Ease of Use: User-friendly interfaces, especially Zapier.
- Customization: Offers flexibility in creating custom workflows.
Disadvantages:
- Cost: Requires a subscription to the integration platform.
- Complexity: Can become complex for highly customized integrations.
3. Custom Code Integrations (Advanced)
For businesses with unique requirements or complex integration needs, custom code integrations may be necessary. This involves writing custom code to connect Webflow with your CRM. This method provides the greatest flexibility and control but requires coding knowledge and technical expertise.
How it Works:
- API Access: Your CRM must provide an Application Programming Interface (API) that allows you to interact with its data.
- Webflow Custom Code: You’ll use Webflow’s custom code features to add scripts that send data from your forms to your CRM’s API.
- Data Mapping: You’ll need to map the fields from your Webflow forms to the corresponding fields in your CRM.
- Data Handling: You’ll handle the data transfer, error handling, and data validation in your custom code.
Advantages:
- Maximum Flexibility: Offers complete control over the integration process.
- Customization: Allows for highly customized workflows.
Disadvantages:
- Technical Expertise: Requires coding knowledge (HTML, CSS, JavaScript).
- Time-Consuming: Requires significant time and effort to develop and maintain.
- Maintenance: Requires ongoing maintenance and updates.
Step-by-Step Guide to Integrating Webflow with a CRM (Using Zapier as an Example)
Let’s walk through a practical example of integrating Webflow with a CRM using Zapier. We’ll focus on a common use case: capturing leads from a Webflow form and adding them to your CRM.
Prerequisites:
- A Webflow account and website with a form.
- A Zapier account.
- A CRM account (e.g., HubSpot, Zoho CRM, Pipedrive, etc.).
Step 1: Set up Your Webflow Form
- Create a Form: In your Webflow project, create a form with the fields you want to capture (e.g., Name, Email, Phone Number, Company, etc.).
- Customize Your Form: Design your form to be user-friendly and visually appealing.
- Test Your Form: Publish your form and test it by submitting a test entry to ensure it works correctly.
Step 2: Set up Your Zap in Zapier
- Create a New Zap: Log in to your Zapier account and click “Create Zap.”
- Choose a Trigger: Search for “Webflow” and select “New Form Submission” as your trigger.
- Connect Your Webflow Account: Connect your Webflow account to Zapier by entering your Webflow API key (found in your Webflow project settings).
- Select Your Webflow Form: Choose the specific form you want to connect to your CRM.
- Test Your Trigger: Zapier will test your trigger by retrieving a recent form submission from your Webflow site. If successful, you’ll see the data from the test submission.
- Choose an Action: Search for your CRM (e.g., HubSpot, Zoho CRM, etc.) and select the appropriate action (e.g., “Create Contact”).
- Connect Your CRM Account: Connect your CRM account to Zapier by entering your CRM credentials.
- Map the Fields: Map the fields from your Webflow form to the corresponding fields in your CRM. For example, map the “Email” field from your Webflow form to the “Email” field in your CRM.
- Customize Your Action: Customize your action by adding any additional information to your CRM contact, such as assigning them to a sales rep or adding them to a specific list.
- Test Your Action: Test your action by sending a test contact to your CRM.
- Turn on Your Zap: Once you’re satisfied with the results, turn on your Zap, and you’re done! Your Webflow form submissions will now automatically be added to your CRM.
Step 3: Testing and Refinement
- Test Thoroughly: Submit several test form entries to your Webflow form and verify that they are correctly added to your CRM.
- Monitor Your Zap: Monitor your Zap’s activity in Zapier to ensure it’s running smoothly and to identify any errors.
- Refine Your Workflow: Adjust your Zap’s settings or add additional steps to refine your workflow and meet your specific needs. For example, you could add a step to send an automated email to new leads or to update a deal stage in your CRM based on their form submission data.
Advanced CRM Integration Strategies for Webflow
Once you have the basic integration set up, you can explore more advanced strategies to maximize the benefits of your CRM and Webflow integration:
- Segmentation and Personalization: Use the data captured from your Webflow forms to segment your audience in your CRM and personalize your website content, email marketing campaigns, and sales interactions.
- Lead Scoring and Qualification: Implement lead scoring rules in your CRM to automatically rank leads based on their behavior on your Webflow site and other factors. This allows you to prioritize your sales efforts and focus on the most promising leads.
- Workflow Automation: Automate complex workflows, such as sending automated email sequences based on user behavior, updating deal stages in your CRM, and assigning leads to sales reps.
- E-commerce Integration: If you have an e-commerce store on Webflow, integrate your CRM with your e-commerce platform to track customer purchases, abandoned carts, and other e-commerce data. This allows you to personalize your marketing efforts and improve your customer retention rates.
- Reporting and Analytics: Use your CRM’s reporting and analytics features to track key metrics, such as lead generation, conversion rates, and customer lifetime value. This will help you to optimize your website, marketing efforts, and sales strategies.
- Conditional Logic: Leverage conditional logic within your integration platform (e.g., Zapier or Make.com) to create more sophisticated workflows. For instance, route leads to different sales teams based on the information they provide in a Webflow form.
- Two-Way Syncing: Explore two-way syncing options where data changes in your CRM are reflected in Webflow (e.g., updating customer profiles on your website based on CRM data). This requires more complex setup.
- Webhooks: Utilize Webhooks to receive real-time data updates from Webflow in your CRM. This is useful for triggering actions immediately after a form submission or other event.
Troubleshooting Common Integration Issues
Even with careful planning, you may encounter some issues during the integration process. Here are some common problems and how to troubleshoot them:
- Data Not Syncing: Double-check that your Zap or Make.com scenario is active. Verify that the trigger is set up correctly and that your Webflow form is publishing new submissions. Review the field mapping to ensure data is flowing to the correct CRM fields.
- Incorrect Data Mapping: Review the field mapping in your integration platform. Ensure that the fields from your Webflow form are mapped to the correct fields in your CRM.
- API Errors: API errors can occur due to rate limits, incorrect credentials, or other technical issues. Check the documentation for your CRM and Webflow for API limitations and troubleshooting steps.
- Form Errors: Ensure your Webflow form is functioning correctly. Test the form by submitting a test entry. Check for any required fields that may be causing errors.
- Subscription Limits: Ensure that your subscription to your integration platform (e.g., Zapier or Make.com) has sufficient task allowances to handle the volume of data you’re processing.
- Data Format Issues: Verify that the data formats between Webflow and your CRM are compatible. For instance, ensure date formats, phone number formats, and other data types are consistent.
- Authorization Issues: Review the authorization settings for your CRM and Webflow integrations. Ensure that the connection credentials are correct and that the integration platform has the necessary permissions to access your data.
- Contact Support: If you can’t resolve the issue, reach out to the support teams for your CRM, Webflow, and integration platform for assistance.
Best Practices for Maintaining Your CRM Integration
Once your Webflow and CRM integration is up and running, it’s essential to maintain it to ensure it continues to function smoothly and effectively. Here are some best practices:
- Regular Monitoring: Monitor your integration’s activity in your integration platform to identify any errors or issues.
- Data Integrity: Regularly review the data in your CRM to ensure its accuracy and completeness.
- Update Forms and Workflows: Update your Webflow forms and workflows as your business evolves.
- Test Regularly: Test your integration regularly to ensure it’s working correctly after any updates or changes.
- Document Your Setup: Document your integration setup, including the steps you took to configure it and any custom code you used. This will help you troubleshoot issues and make changes in the future.
- Stay Updated: Stay informed about the latest features and updates for your CRM, Webflow, and integration platform.
- Review Permissions: Periodically review the permissions granted to your integration platform to ensure they are still appropriate.
- Security: Implement security best practices for your integration platform and CRM to protect your data.
Conclusion: Unleashing the Power of Webflow and CRM Integration
Integrating Webflow with a CRM is a game-changer for businesses looking to streamline their lead generation, sales, and marketing efforts. By following the steps outlined in this guide, you can create a powerful and efficient workflow that will help you capture leads, nurture relationships, and drive revenue growth. Remember to choose the right CRM for your needs, select the appropriate integration method, and follow best practices to ensure your integration remains effective over time. With the right setup, your Webflow website will become a powerful engine for driving business success.
The combination of Webflow’s design flexibility and a CRM’s data management capabilities creates a synergistic relationship. By connecting these two platforms, you unlock the ability to deliver personalized experiences, automate your workflows, and gain valuable insights into your customer’s journey. This integration isn’t just about connecting two pieces of software; it’s about building a more efficient, customer-centric business.
Embrace the power of Webflow and CRM integration, and watch your business flourish!


