CRM for Small Businesses: Trends Shaping the Future (and How to Thrive)
CRM for Small Businesses: Trends Shaping the Future (and How to Thrive)
Running a small business is a wild ride. You’re juggling a million things at once – from product development and marketing to customer service and, of course, keeping the finances in order. In the midst of this whirlwind, it’s easy to let things slip, especially when it comes to managing your most valuable asset: your customers. That’s where a Customer Relationship Management (CRM) system comes in. It’s more than just a fancy piece of software; it’s the backbone of a customer-centric business.
But the world of CRM is constantly evolving. What worked last year might not cut it today. To stay ahead of the curve, small businesses need to understand the latest CRM trends and how they can leverage them to boost efficiency, improve customer satisfaction, and ultimately, drive growth. This article dives deep into the current and future trends in CRM for small businesses, equipping you with the knowledge you need to make informed decisions and thrive in a competitive market.
The Rise of the Customer-Centric Approach
Before we dive into specific trends, it’s crucial to understand the overarching shift in business philosophy: the move towards a customer-centric approach. Gone are the days of simply pushing products or services. Today, businesses that truly succeed are those that prioritize understanding and meeting the needs of their customers. This means:
- Personalization: Tailoring experiences to individual customer preferences.
- Proactive Engagement: Anticipating customer needs and reaching out before they even realize they have a problem.
- Seamless Experiences: Providing a consistent and smooth journey across all touchpoints.
This customer-centric philosophy is the foundation upon which all the following CRM trends are built. A CRM system is the tool that empowers small businesses to put this philosophy into practice.
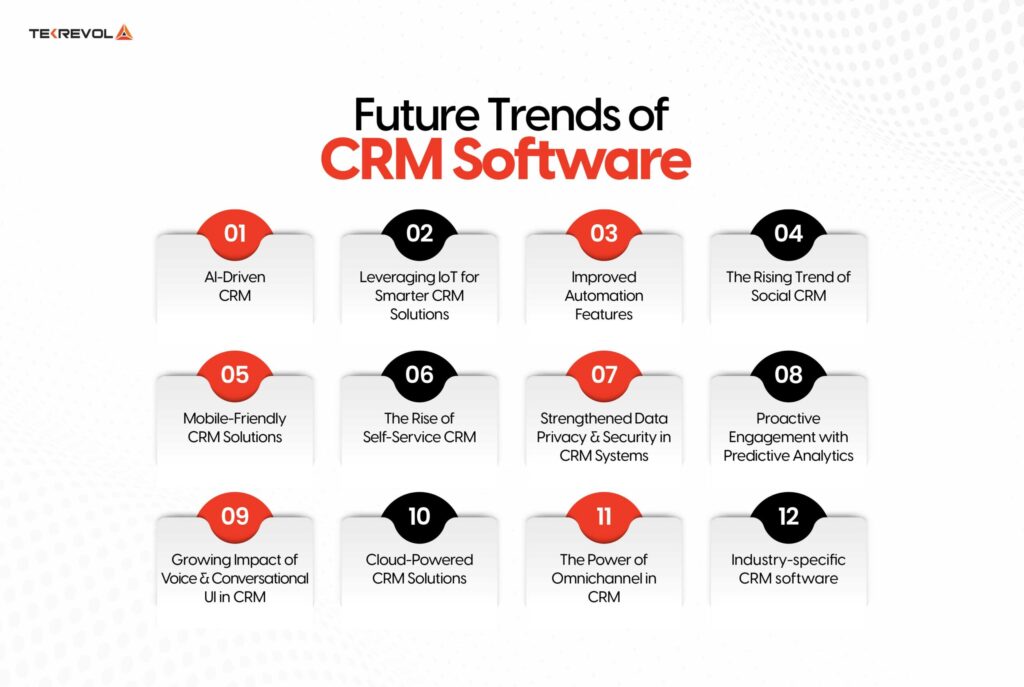
Top CRM Trends for Small Businesses in 2024 and Beyond
Let’s explore the key trends that are shaping the CRM landscape for small businesses. Understanding these trends will help you choose the right CRM solution and implement strategies that maximize its impact.
1. AI-Powered CRM: The Smartest Assistant You’ll Ever Have
Artificial intelligence (AI) is no longer a futuristic concept; it’s a present-day reality, and it’s revolutionizing CRM. AI-powered CRM systems are capable of:
- Predictive Analytics: Forecasting customer behavior, identifying potential churn, and predicting future sales. This allows you to proactively address issues and capitalize on opportunities.
- Automation: Automating repetitive tasks such as data entry, email follow-ups, and lead scoring, freeing up your team to focus on more strategic activities.
- Personalized Recommendations: Offering tailored product suggestions and content based on customer data and preferences.
- Chatbots: Providing instant customer support and answering frequently asked questions, 24/7.
For small businesses, AI-powered CRM can be a game-changer. It levels the playing field by providing access to sophisticated insights and automation capabilities that were once only available to larger enterprises. Consider this: an AI-powered CRM can analyze your sales data to identify the most promising leads, automatically nurture them with personalized email campaigns, and alert your sales team when a lead is ready to convert. This level of efficiency and effectiveness is invaluable for a small business that needs to maximize its resources.
2. Mobile CRM: The Power of CRM in Your Pocket
In today’s fast-paced world, mobility is key. Small business owners and their teams are constantly on the go, meeting with clients, attending events, and working from various locations. Mobile CRM solutions allow you to access and manage your customer data from anywhere, at any time, using your smartphone or tablet.
Key benefits of mobile CRM include:
- Real-time Access to Information: Access customer profiles, sales data, and communication history instantly, regardless of your location.
- Improved Collaboration: Share information and collaborate with your team in real-time, even when you’re not in the office.
- Increased Productivity: Update customer records, log interactions, and manage tasks while on the go, saving valuable time.
- Enhanced Customer Service: Respond to customer inquiries and resolve issues quickly, improving customer satisfaction.
A mobile CRM empowers your team to be more responsive and efficient, allowing them to stay connected with customers and close deals faster. This is particularly critical for businesses with a field sales force or those that rely on frequent client interactions.
3. Social CRM: Engaging Customers Where They Are
Social media has become an integral part of the customer journey. Customers are using platforms like Facebook, Twitter, Instagram, and LinkedIn to connect with businesses, ask questions, and share their experiences. Social CRM integrates social media data with your CRM system, allowing you to:
- Monitor Social Media Mentions: Track brand mentions, comments, and reviews to understand customer sentiment and identify potential issues.
- Engage in Real-Time: Respond to customer inquiries and resolve issues directly on social media platforms.
- Gather Customer Insights: Learn about your customers’ interests, preferences, and behaviors by analyzing their social media activity.
- Run Targeted Campaigns: Create and launch highly targeted marketing campaigns based on social media data.
Social CRM enables small businesses to build stronger relationships with their customers by meeting them where they are. It provides valuable insights into customer preferences, allowing you to personalize your interactions and tailor your marketing efforts. For example, if you notice a customer frequently posts about a particular product, you can reach out with a special offer or personalized recommendation.
4. Integration is Key: Seamless Connections for Maximum Efficiency
A CRM system is most effective when it integrates with other essential business tools. This integration eliminates data silos, streamlines workflows, and provides a holistic view of your customer interactions. Key integrations to consider include:
- Email Marketing Platforms: Integrate your CRM with your email marketing platform to automate email campaigns, track open rates, and personalize your messaging.
- Accounting Software: Connect your CRM with your accounting software to streamline invoicing, track payments, and manage financial data.
- E-commerce Platforms: Integrate your CRM with your e-commerce platform to track customer purchases, manage orders, and personalize the online shopping experience.
- Customer Service Software: Connect your CRM with your customer service software to provide seamless support and track customer interactions.
By integrating your CRM with other business tools, you can eliminate manual data entry, reduce errors, and improve overall efficiency. This allows you to focus on what matters most: building relationships with your customers and growing your business.
5. The Rise of CRM for Specific Industries
While general-purpose CRM systems are still widely used, there’s a growing trend towards industry-specific CRM solutions. These specialized systems are designed to meet the unique needs of businesses in specific industries, such as:
- Real Estate: Managing leads, tracking properties, and coordinating showings.
- Healthcare: Managing patient information, scheduling appointments, and streamlining communication.
- Financial Services: Managing client portfolios, tracking investments, and ensuring compliance.
- Manufacturing: Managing sales cycles, tracking orders, and coordinating production.
Industry-specific CRM systems offer pre-built features and functionalities that are tailored to the specific requirements of your industry. This can save you time and effort by eliminating the need to customize a general-purpose CRM system. They often come with pre-built reports, dashboards, and workflows that are designed to address the unique challenges and opportunities of your industry.
6. Focus on Data Privacy and Security
With increasing concerns about data privacy and security, CRM providers are prioritizing the protection of customer data. Small businesses need to choose CRM systems that offer robust security features, including:
- Data Encryption: Protecting sensitive data from unauthorized access.
- Two-Factor Authentication: Adding an extra layer of security to prevent unauthorized logins.
- Compliance with Data Privacy Regulations: Ensuring compliance with regulations such as GDPR and CCPA.
- Regular Security Audits: Conducting regular security audits to identify and address potential vulnerabilities.
Choosing a CRM system that prioritizes data privacy and security is essential for protecting your customers’ information and maintaining their trust. It also helps you avoid costly fines and legal issues.
Choosing the Right CRM for Your Small Business
Selecting the right CRM system is a crucial decision that can significantly impact your business’s success. Here’s a step-by-step guide to help you choose the right CRM for your small business:
1. Define Your Needs and Goals
Before you start evaluating CRM systems, take the time to define your specific needs and goals. Ask yourself:
- What are your current pain points?
- What are your key objectives for implementing a CRM system?
- What features and functionalities are essential for your business?
- How many users will need access to the CRM system?
- What is your budget?
Clearly defining your needs and goals will help you narrow down your options and choose a CRM system that is the right fit for your business.
2. Research and Compare CRM Solutions
Once you have defined your needs and goals, it’s time to research and compare different CRM solutions. Consider the following factors:
- Features: Does the CRM system offer the features and functionalities you need?
- Ease of Use: Is the CRM system user-friendly and easy to learn?
- Scalability: Can the CRM system scale to accommodate your future growth?
- Integration Capabilities: Does the CRM system integrate with your existing business tools?
- Pricing: Is the CRM system affordable and offers a pricing plan that fits your budget?
- Customer Support: Does the CRM provider offer adequate customer support?
- Reviews and Ratings: Read reviews and ratings from other users to get an idea of the CRM system’s strengths and weaknesses.
There are many CRM options available, so take your time and carefully evaluate each solution to find the one that best meets your needs.
3. Consider the Deployment Method
CRM systems can be deployed in two main ways:
- Cloud-based CRM: This type of CRM is hosted on the vendor’s servers and accessed over the internet. Cloud-based CRM is typically more affordable and easier to implement than on-premise CRM.
- On-premise CRM: This type of CRM is hosted on your own servers. On-premise CRM offers more control over your data but requires more technical expertise and can be more expensive to implement and maintain.
For most small businesses, cloud-based CRM is the best option. It’s more affordable, easier to implement, and offers greater flexibility.
4. Take Advantage of Free Trials and Demos
Most CRM vendors offer free trials or demos of their products. Take advantage of these opportunities to test out the CRM system and see if it’s a good fit for your business. This will give you a firsthand experience of the system’s features and functionalities and help you make a more informed decision.
5. Plan for Implementation and Training
Implementing a CRM system requires careful planning and preparation. Create a detailed implementation plan that includes:
- Data Migration: How will you migrate your existing customer data to the new CRM system?
- Customization: Will you need to customize the CRM system to meet your specific needs?
- Training: How will you train your team to use the CRM system?
- Timeline: What is the timeline for implementing the CRM system?
Provide adequate training to your team to ensure that they know how to use the CRM system effectively. The more your team understands the system, the more successful your CRM implementation will be.
Benefits of CRM for Small Businesses
Implementing a CRM system offers numerous benefits for small businesses, including:
- Improved Customer Relationships: CRM systems help you build stronger relationships with your customers by providing a centralized view of all customer interactions.
- Increased Sales: CRM systems can help you increase sales by identifying and nurturing leads, tracking sales opportunities, and closing deals faster.
- Enhanced Customer Service: CRM systems enable you to provide better customer service by providing your team with instant access to customer information and communication history.
- Increased Efficiency: CRM systems automate repetitive tasks, streamline workflows, and improve overall efficiency.
- Improved Data Analysis: CRM systems provide valuable data and insights that can help you make better business decisions.
- Increased Revenue: By improving customer relationships, increasing sales, and enhancing customer service, CRM systems can help you increase your revenue.
A well-implemented CRM system can be a powerful tool for small businesses, helping them to grow, thrive, and compete in today’s dynamic market.
Overcoming the Challenges of CRM Implementation
While the benefits of CRM are undeniable, implementing a CRM system can also present challenges. Here are some common hurdles and how to overcome them:
- Lack of Employee Buy-in: Employees may resist adopting a new system if they don’t understand its value or are not properly trained. To overcome this, communicate the benefits of the CRM system to your team, provide adequate training, and involve them in the implementation process.
- Data Migration Challenges: Migrating data from your existing systems to the new CRM system can be a complex and time-consuming process. Plan carefully, clean up your data before migrating, and consider hiring a data migration specialist if needed.
- Customization Complexity: Customizing a CRM system to meet your specific needs can be complex and require technical expertise. Carefully consider your customization requirements before implementing the system and choose a CRM system that offers the flexibility you need.
- Poor Data Quality: The accuracy of your CRM data is critical for its effectiveness. Implement data quality controls, such as data validation rules and regular data cleansing, to ensure the accuracy of your data.
- Integration Issues: Integrating your CRM system with other business tools can be challenging. Choose a CRM system that offers seamless integration with your existing tools and work with the vendors to ensure a smooth integration process.
By addressing these potential challenges proactively, you can increase the chances of a successful CRM implementation.
The Future of CRM for Small Businesses: What to Expect
The CRM landscape is constantly evolving, and small businesses need to stay informed about the latest trends to remain competitive. Here’s what you can expect in the future:
- Even More AI-Powered Automation: AI will continue to play a more significant role in CRM, automating more tasks and providing even more sophisticated insights.
- Hyper-Personalization: CRM systems will become even better at personalizing customer experiences based on individual preferences and behaviors.
- Increased Focus on Customer Experience: CRM systems will become even more focused on improving the overall customer experience.
- More Industry-Specific Solutions: The number of industry-specific CRM solutions will continue to grow.
- Greater Emphasis on Data Security and Privacy: Data security and privacy will continue to be a top priority for CRM providers.
The future of CRM for small businesses is bright. By embracing the latest trends and leveraging the power of CRM, small businesses can build stronger customer relationships, increase sales, and achieve sustainable growth.
Final Thoughts: Embrace the CRM Revolution
In today’s business world, a robust CRM system is no longer a luxury; it’s a necessity. For small businesses, it’s the key to unlocking growth, fostering customer loyalty, and staying ahead of the competition. By understanding the latest CRM trends and implementing a well-chosen CRM solution, you can empower your business to thrive in the years to come.
Don’t be afraid to embrace the CRM revolution. The time to invest in a CRM system is now. Your customers, and your bottom line, will thank you for it.


