Unlocking Growth: How CRM Empowers Small Businesses to Capture and Convert Leads
Unlocking Growth: How CRM Empowers Small Businesses to Capture and Convert Leads
The lifeblood of any successful business, particularly a small one, is a steady stream of leads. These are the potential customers, the future clients, the people who can help you grow and thrive. But simply having leads isn’t enough. You need to nurture them, understand their needs, and guide them through the sales process. That’s where a Customer Relationship Management (CRM) system comes in. For small businesses, a well-implemented CRM isn’t just a luxury; it’s a necessity. It’s the engine that drives lead generation, qualification, and conversion, ultimately fueling growth and profitability.
Why CRM Matters for Small Businesses
In the bustling world of small business, every resource counts. Time is precious, budgets are tight, and efficiency is paramount. A CRM system offers a centralized hub for all customer-related information, streamlining processes and freeing up valuable time. It’s like having a super-organized assistant who remembers everything about your customers, allowing you to focus on what matters most: building relationships and closing deals.
Centralized Customer Data
Imagine trying to manage customer interactions across spreadsheets, email inboxes, and scattered notes. It’s a recipe for lost opportunities, missed follow-ups, and frustrated customers. A CRM consolidates all customer data – contact information, communication history, purchase history, and more – into a single, accessible location. This 360-degree view of each customer empowers your team to provide personalized service and tailor their interactions, making customers feel valued and understood.
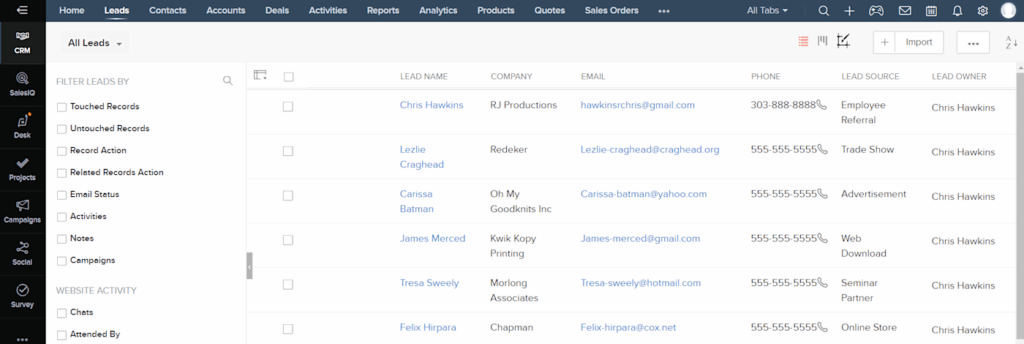
Improved Lead Management
Lead management is a critical function for any business. It involves capturing leads, qualifying them, and nurturing them through the sales funnel. A CRM system automates many of these tasks, such as lead scoring, automated email campaigns, and task reminders. This ensures that no lead falls through the cracks and that your sales team can focus on the most promising prospects.
Enhanced Sales Team Productivity
Sales teams thrive on efficiency. A CRM streamlines the sales process, providing tools for contact management, opportunity tracking, and sales forecasting. Sales reps can quickly access customer information, track their progress, and identify potential roadblocks. This leads to increased productivity, higher conversion rates, and ultimately, more revenue.
Better Customer Service
Happy customers are repeat customers. A CRM system equips your customer service team with the information they need to provide prompt, personalized support. They can quickly access customer history, understand their needs, and resolve issues efficiently. This leads to improved customer satisfaction, increased loyalty, and positive word-of-mouth referrals.
Data-Driven Decision Making
A CRM system provides valuable insights into your sales and marketing efforts. It tracks key metrics such as lead sources, conversion rates, and sales performance. This data allows you to identify what’s working, what’s not, and make informed decisions to optimize your strategies. You can, for example, see which marketing campaigns are generating the most qualified leads or which sales reps are performing best.
Key Features of a CRM for Small Businesses
Not all CRM systems are created equal. When choosing a CRM for your small business, consider these essential features:
Contact Management
At its core, a CRM is a contact management system. It should allow you to store and organize customer contact information, including names, email addresses, phone numbers, and social media profiles. It should also allow you to segment your contacts based on various criteria, such as demographics, purchase history, and lead source.
Lead Management
The lead management features of a CRM are crucial for converting prospects into customers. Look for features such as lead scoring, lead nurturing workflows, and the ability to track lead sources. The system should allow you to assign leads to sales reps and monitor their progress through the sales funnel.
Sales Automation
Sales automation features can significantly improve your sales team’s productivity. Look for features such as automated email campaigns, task reminders, and sales pipeline management. These features will help your team stay organized, follow up with leads promptly, and close deals more efficiently.
Reporting and Analytics
Data is the lifeblood of informed decision-making. A good CRM system provides robust reporting and analytics capabilities. You should be able to track key metrics such as sales performance, conversion rates, and customer satisfaction. These insights will help you identify areas for improvement and optimize your sales and marketing strategies.
Integration with Other Tools
Your CRM should integrate seamlessly with other tools you use, such as email marketing platforms, accounting software, and social media channels. This will streamline your workflows and eliminate the need for manual data entry.
Mobile Accessibility
In today’s fast-paced world, your sales team needs access to customer information on the go. Choose a CRM that offers a mobile app or a responsive web interface, allowing them to access and update data from their smartphones or tablets.
Choosing the Right CRM for Your Small Business
Selecting the right CRM is a crucial decision. Here are some factors to consider:
Business Needs
What are your specific needs and goals? Do you need a CRM primarily for sales, marketing, or customer service? Consider the size of your team, your sales cycle, and the complexity of your business processes. The CRM you choose should be a good fit for your current needs and have the scalability to accommodate future growth.
Budget
CRM systems range in price from free to expensive. Determine your budget and consider the cost of the software, implementation, training, and ongoing support. There are many affordable CRM options available for small businesses.
Ease of Use
A CRM is only useful if your team actually uses it. Choose a system that is intuitive and easy to use. Look for a user-friendly interface, clear instructions, and helpful tutorials. The easier the system is to use, the more likely your team will adopt it.
Scalability
As your business grows, your CRM needs to grow with it. Choose a system that can scale to accommodate your increasing number of users, data, and features. Consider whether the system offers add-ons or integrations that can enhance its functionality.
Integration Capabilities
Ensure the CRM integrates with the other tools you use, such as your email marketing platform, accounting software, and social media channels. This will streamline your workflows and eliminate the need for manual data entry.
Customer Support
Choose a CRM provider that offers excellent customer support. Look for options such as online documentation, email support, phone support, and live chat. Reliable customer support can be invaluable when you need help with the system.
Implementing Your CRM Successfully
Once you’ve chosen a CRM, successful implementation is key. Here are some tips to ensure a smooth transition:
Define Your Goals
Before you start implementing your CRM, define your goals. What do you hope to achieve with the system? Are you looking to increase sales, improve customer satisfaction, or streamline your sales process? Having clear goals will help you measure your success and ensure you’re getting the most out of your CRM.
Clean Your Data
Before importing your data into the CRM, clean it up. Remove duplicate entries, correct errors, and standardize formatting. Clean data is essential for accurate reporting and effective lead management.
Train Your Team
Provide adequate training to your team on how to use the CRM. This includes training on how to enter data, manage leads, track sales, and generate reports. The more familiar your team is with the system, the more likely they are to use it effectively.
Customize the System
Customize the CRM to fit your specific business needs. Configure the system to match your sales process, create custom fields, and integrate it with other tools you use. Customization will make the system more relevant and useful for your team.
Monitor and Evaluate
Regularly monitor and evaluate your CRM usage. Track key metrics such as lead conversion rates, sales performance, and customer satisfaction. Identify areas for improvement and make adjustments as needed. This will help you optimize your CRM and ensure it continues to meet your business needs.
CRM Systems for Small Businesses: A Few Examples
The CRM landscape is vast. Here are a few popular options for small businesses, each with its own strengths:
HubSpot CRM
HubSpot CRM is a popular choice for small businesses, particularly those focused on inbound marketing. It offers a free version with basic features, making it accessible for startups. Its user-friendly interface and robust marketing automation capabilities make it a strong contender.
Zoho CRM
Zoho CRM is a comprehensive and affordable CRM solution that caters to a wide range of businesses. It offers a variety of features, including sales automation, lead management, and customer service tools. Zoho CRM is highly customizable and integrates with other Zoho apps, providing a complete suite of business solutions.
Pipedrive
Pipedrive is a sales-focused CRM designed to help sales teams manage their pipelines and close deals. It offers a visual interface that makes it easy to track deals and monitor progress. Pipedrive is known for its simplicity and ease of use, making it a good option for sales-driven small businesses.
Insightly
Insightly is a CRM that focuses on building strong customer relationships. It offers features such as contact management, project management, and sales automation. Insightly is a good option for businesses that want to manage their customer relationships and track their projects in one place.
Freshsales
Freshsales (now Freshworks CRM) is another great option for small businesses, emphasizing ease of use and affordability. It provides a comprehensive suite of features, including lead management, sales automation, and built-in phone and email functionalities.
Maximizing Lead Generation with CRM
A CRM can be a powerful tool for lead generation. Here are some strategies to leverage your CRM for lead capture:
Website Integration
Integrate your CRM with your website to capture leads automatically. Use forms, pop-ups, and live chat to collect contact information and store it directly in your CRM. This streamlines the lead capture process and ensures that no leads are missed.
Social Media Integration
Connect your CRM with your social media channels to capture leads generated through social media campaigns. Track engagement, monitor conversations, and identify potential customers. This will help you understand your audience and tailor your marketing efforts.
Email Marketing Integration
Integrate your CRM with your email marketing platform to nurture leads through targeted email campaigns. Segment your leads based on their behavior, interests, and demographics, and send them relevant content to guide them through the sales funnel. This will help you improve your conversion rates and build strong customer relationships.
Landing Pages
Create dedicated landing pages for your marketing campaigns. Include clear calls to action and capture lead information through forms. Integrate these forms with your CRM to automatically add leads to your database. This allows you to track the performance of your landing pages and optimize your lead generation efforts.
Lead Scoring
Utilize lead scoring to prioritize your leads. Assign points to leads based on their behavior, demographics, and engagement with your marketing materials. This will help your sales team focus on the most promising prospects and increase their chances of closing deals.
Converting Leads into Customers: CRM’s Role
CRM is not just about capturing leads; it’s about converting them into paying customers. Here’s how CRM supports the conversion process:
Sales Pipeline Management
A CRM provides a visual representation of your sales pipeline, allowing you to track the progress of each lead through the sales stages. This helps your sales team stay organized, identify potential roadblocks, and focus on closing deals. You can also customize the pipeline to align with your specific sales process.
Sales Automation
Automate repetitive sales tasks, such as sending follow-up emails, scheduling appointments, and creating tasks. This frees up your sales team to focus on building relationships and closing deals. Sales automation also ensures that leads are followed up with promptly and consistently.
Personalized Communication
Leverage the customer data stored in your CRM to personalize your communication with leads. Tailor your messages to their specific needs, interests, and pain points. Personalized communication builds trust and increases the likelihood of converting leads into customers.
Sales Forecasting
Use the data in your CRM to forecast future sales. This helps you make informed decisions about your sales strategy, allocate resources effectively, and set realistic sales targets. Sales forecasting also allows you to identify potential risks and opportunities in your sales pipeline.
Activity Tracking
Track all interactions with leads, including calls, emails, meetings, and presentations. This provides a complete history of your interactions and helps your sales team stay informed about the lead’s progress. Activity tracking also helps you identify areas for improvement in your sales process.
Measuring Success: Key CRM Metrics
To understand the impact of your CRM on lead generation and conversion, track key metrics:
Lead Generation Volume
How many leads are you generating each month? Track the volume of leads generated from different sources, such as your website, social media, and email campaigns. This helps you identify your most effective lead generation channels.
Lead Conversion Rate
What percentage of your leads are converting into customers? Track the conversion rate for each stage of your sales pipeline. This helps you identify areas where you can improve your conversion process.
Sales Cycle Length
How long does it take to close a deal? Track the average sales cycle length. This helps you identify bottlenecks in your sales process and optimize your sales efforts.
Customer Acquisition Cost (CAC)
How much does it cost to acquire a new customer? Calculate your CAC by dividing your total marketing and sales expenses by the number of new customers acquired. This helps you assess the efficiency of your lead generation and sales efforts.
Customer Lifetime Value (CLTV)
What is the total revenue you expect to generate from a customer over their lifetime? Calculate your CLTV to assess the long-term value of your customers. This helps you prioritize your efforts and make informed decisions about your customer acquisition and retention strategies.
The Future of CRM for Small Businesses
CRM technology is constantly evolving. Here are some emerging trends that are shaping the future of CRM for small businesses:
Artificial Intelligence (AI)
AI is transforming the CRM landscape. AI-powered CRM systems can automate tasks, provide predictive insights, and personalize customer interactions. Expect to see more AI-driven features, such as chatbots, virtual assistants, and predictive analytics, in CRM systems in the future.
Mobile CRM
Mobile CRM is becoming increasingly important. Sales teams need access to customer data on the go. Expect to see more mobile-first CRM solutions and enhanced mobile features, such as voice-activated assistants and offline access.
Social CRM
Social CRM integrates social media channels with CRM systems. This allows businesses to monitor social media conversations, engage with customers, and gather insights about their brand. Expect to see more sophisticated social CRM features, such as sentiment analysis and social listening tools.
Personalization
Personalization is becoming increasingly important. Customers expect personalized experiences. Expect to see more CRM systems that offer advanced personalization capabilities, such as dynamic content, personalized recommendations, and targeted marketing campaigns.
Conclusion: Embrace CRM for Sustainable Growth
For small businesses aiming to thrive in a competitive market, a CRM system is not just an option; it’s a strategic imperative. It is the catalyst for lead generation, the engine for conversion, and the foundation for enduring customer relationships. By embracing the power of CRM, small businesses can unlock their full potential, drive sustainable growth, and achieve lasting success. The journey may require an initial investment of time and resources, but the rewards – increased efficiency, improved sales, and a loyal customer base – are well worth the effort. So, take the leap, choose the right CRM for your business, and embark on a path to accelerated growth.


