Unlocking Growth: How CRM, Marketing, and Customer Feedback Drive Unprecedented Success
Unlocking Growth: How CRM, Marketing, and Customer Feedback Drive Unprecedented Success
In today’s fiercely competitive business landscape, understanding your customers is no longer a luxury—it’s a necessity. Businesses that truly grasp their customers’ needs, preferences, and pain points are the ones that thrive. This is where the powerful synergy of Customer Relationship Management (CRM) systems, strategic marketing efforts, and insightful customer feedback comes into play. By integrating these three crucial elements, businesses can forge deeper customer connections, optimize marketing campaigns, and ultimately, achieve unprecedented levels of success.
This comprehensive guide delves into the intricate relationship between CRM, marketing, and customer feedback. We’ll explore how these components work together, the benefits they offer, and practical strategies for implementation. Whether you’re a seasoned marketer, a business owner looking to enhance customer relationships, or simply curious about the power of these tools, this article is designed to provide you with actionable insights and a roadmap to success.
The Cornerstone: Understanding CRM
At the heart of this interconnected ecosystem lies CRM. Think of it as the central nervous system of your customer interactions. CRM is more than just software; it’s a philosophy centered around building and nurturing lasting relationships with customers. A robust CRM system acts as a centralized repository for all customer-related data, providing a 360-degree view of each customer’s journey.
What is CRM?
CRM, or Customer Relationship Management, is a technology and strategy for managing all your company’s relationships and interactions with current and potential customers. The goal is simple: improve business relationships. A CRM system helps companies stay connected to customers, streamline processes, and improve profitability. When people talk about CRM, they are usually referring to a CRM system – a tool that helps with contact management, sales management, productivity, and more.
Key Features of a CRM System
- Contact Management: Store and organize customer contact information, including names, addresses, phone numbers, and email addresses.
- Sales Automation: Automate sales processes, such as lead generation, opportunity tracking, and deal closing.
- Marketing Automation: Automate marketing campaigns, including email marketing, social media marketing, and lead nurturing.
- Customer Service: Manage customer inquiries, resolve issues, and provide excellent customer support.
- Reporting and Analytics: Track key performance indicators (KPIs), analyze data, and generate reports to gain insights into customer behavior and business performance.
Benefits of Implementing a CRM System
- Improved Customer Relationships: By centralizing customer data, CRM systems enable businesses to personalize interactions and provide better customer service.
- Increased Sales: CRM systems help sales teams manage leads, track opportunities, and close deals more efficiently.
- Enhanced Marketing Effectiveness: CRM systems provide valuable insights into customer behavior, allowing marketers to create more targeted and effective campaigns.
- Streamlined Operations: CRM systems automate processes, reducing manual tasks and improving overall efficiency.
- Data-Driven Decision Making: CRM systems provide access to real-time data and analytics, enabling businesses to make informed decisions.
The Art and Science of Marketing
Marketing is the engine that drives customer acquisition and brand awareness. However, in today’s digital age, traditional marketing methods are often insufficient. Effective marketing requires a deep understanding of your target audience, a well-defined strategy, and the ability to adapt to changing market trends. When coupled with CRM and customer feedback, marketing becomes even more powerful.
The Role of Marketing in the CRM Ecosystem
Marketing and CRM work hand-in-hand to attract, engage, and retain customers. CRM provides marketers with the data and insights they need to understand their target audience and create personalized campaigns. Marketing, in turn, generates leads, nurtures prospects, and drives sales, feeding valuable data back into the CRM system. This creates a virtuous cycle of continuous improvement.
Key Marketing Strategies in the CRM Context
- Content Marketing: Create valuable and engaging content that attracts and educates your target audience.
- Email Marketing: Send targeted email campaigns to nurture leads, promote products or services, and build customer relationships.
- Social Media Marketing: Engage with your audience on social media platforms, build brand awareness, and drive traffic to your website.
- Search Engine Optimization (SEO): Optimize your website and content to rank higher in search engine results pages (SERPs).
- Paid Advertising: Utilize paid advertising platforms, such as Google Ads and social media ads, to reach a wider audience.
The Power of Segmentation and Personalization
One of the most significant advantages of integrating marketing with CRM is the ability to segment your audience and personalize your messaging. By analyzing customer data within the CRM system, marketers can divide their audience into distinct segments based on demographics, behavior, purchase history, and other relevant factors. This allows them to create highly targeted campaigns that resonate with specific customer groups.
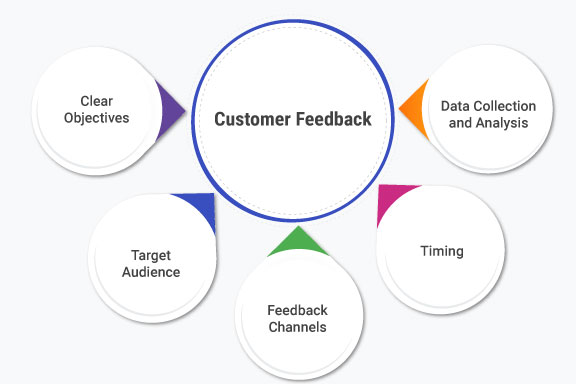
The Voice of the Customer: Customer Feedback
Customer feedback is the lifeblood of any successful business. It provides invaluable insights into customer satisfaction, product performance, and areas for improvement. By actively seeking and analyzing customer feedback, businesses can identify pain points, address issues, and continuously refine their offerings. When integrated with CRM and marketing, customer feedback becomes a powerful tool for driving customer loyalty and business growth.
Collecting Customer Feedback
There are several methods for collecting customer feedback, each with its own advantages and disadvantages. The best approach often involves a combination of methods to gather a comprehensive understanding of the customer experience.
- Surveys: Surveys are a popular method for collecting quantitative and qualitative feedback. They can be distributed via email, online, or in person.
- Feedback Forms: Feedback forms can be embedded on your website, in your app, or at the point of sale.
- Social Media Monitoring: Monitor social media platforms for mentions of your brand, products, or services.
- Customer Reviews: Encourage customers to leave reviews on websites like Google, Yelp, and industry-specific review sites.
- Customer Interviews: Conduct one-on-one interviews with customers to gather in-depth feedback.
- Focus Groups: Organize focus groups to gather feedback from a group of customers.
- Customer Service Interactions: Train your customer service team to gather feedback during their interactions with customers.
Analyzing Customer Feedback
Once you’ve collected customer feedback, it’s crucial to analyze it to identify trends, patterns, and areas for improvement. This can be done manually or with the help of specialized software. Some common methods for analyzing customer feedback include:
- Sentiment Analysis: Determine the overall sentiment of customer feedback (positive, negative, or neutral).
- Keyword Analysis: Identify the most frequently used keywords and phrases in customer feedback.
- Theme Analysis: Identify recurring themes or topics in customer feedback.
- Trend Analysis: Track changes in customer feedback over time to identify trends and patterns.
Acting on Customer Feedback
Collecting customer feedback is only half the battle. The real value lies in taking action based on the feedback you receive. This may involve:
- Improving Products or Services: Use feedback to identify areas for improvement in your products or services.
- Enhancing Customer Service: Train your customer service team to address common customer issues and provide better support.
- Refining Marketing Campaigns: Use feedback to tailor your marketing messages and campaigns to better meet customer needs.
- Making Process Improvements: Identify and address inefficiencies in your business processes.
- Communicating with Customers: Let your customers know that you’ve heard their feedback and are taking action.
The Integrated Approach: CRM, Marketing, and Customer Feedback in Harmony
The true power of CRM, marketing, and customer feedback lies in their integration. When these three elements work together seamlessly, businesses can achieve remarkable results. Here’s how they can be integrated:
1. CRM as the Central Hub
The CRM system serves as the central hub for all customer-related data. It stores customer contact information, purchase history, interactions, and feedback. This centralized data allows for a 360-degree view of each customer.
2. Marketing Leveraging CRM Data
Marketing teams can use the data stored in the CRM system to segment their audience, personalize their messaging, and target their campaigns more effectively. For example, they can create email campaigns that are tailored to specific customer segments based on their purchase history or demographics.
3. Customer Feedback Fueling CRM and Marketing
Customer feedback provides valuable insights that can be used to improve products, services, and marketing campaigns. This feedback can be integrated directly into the CRM system, allowing businesses to track customer sentiment and identify areas for improvement. This data then informs the marketing strategy.
4. Creating a Feedback Loop
The integration of CRM, marketing, and customer feedback creates a continuous feedback loop. Customer feedback informs marketing campaigns, which generate new leads and sales. This data is then fed back into the CRM system, where it can be used to further refine marketing efforts and improve customer relationships.
Practical Strategies for Integration
- Choose a CRM System that Integrates with Marketing Automation Tools: This will allow you to automate marketing campaigns and track customer behavior.
- Use Customer Feedback Tools that Integrate with Your CRM: This will allow you to automatically import customer feedback into your CRM system.
- Create a Customer Journey Map: This will help you visualize the customer experience and identify opportunities to improve it.
- Establish Clear Communication Channels: Ensure that all departments have access to the same customer data and are communicating effectively.
- Train Your Employees: Train your employees on how to use the CRM system, collect customer feedback, and implement marketing strategies.
Measuring Success: KPIs and Metrics
To ensure that your CRM, marketing, and customer feedback initiatives are successful, it’s essential to track key performance indicators (KPIs) and metrics. This will allow you to measure your progress, identify areas for improvement, and demonstrate the return on investment (ROI) of your efforts.
Key KPIs to Track
- Customer Acquisition Cost (CAC): The cost of acquiring a new customer.
- Customer Lifetime Value (CLTV): The predicted revenue a customer will generate over their lifetime.
- Customer Retention Rate: The percentage of customers who remain loyal to your business.
- Customer Satisfaction (CSAT): The level of satisfaction customers have with your products or services.
- Net Promoter Score (NPS): A metric that measures customer loyalty and willingness to recommend your business.
- Conversion Rate: The percentage of leads that convert into customers.
- Website Traffic and Engagement: Track website visits, bounce rate, time on site, and other metrics to measure the effectiveness of your marketing efforts.
Using Data to Drive Improvement
By regularly monitoring your KPIs and metrics, you can identify areas for improvement and make data-driven decisions. For example, if your CAC is high, you might need to adjust your marketing strategy or improve your sales process. If your CSAT score is low, you might need to address customer service issues or improve your products or services.
Real-World Examples of Success
The power of integrating CRM, marketing, and customer feedback is evident in the success stories of numerous businesses. Here are a few examples:
Example 1: E-commerce Retailer
An e-commerce retailer implemented a CRM system to manage customer data, track purchase history, and personalize marketing campaigns. They also implemented customer surveys to gather feedback on their products and services. By analyzing the data, they were able to identify areas for improvement in their product offerings and customer service. As a result, they saw a significant increase in customer satisfaction, repeat purchases, and overall revenue.
Example 2: SaaS Company
A Software-as-a-Service (SaaS) company used a CRM system to manage leads, track sales opportunities, and provide customer support. They also implemented a feedback form on their website and in their app to collect customer feedback. By analyzing the feedback, they were able to identify areas for improvement in their product features and user experience. They used this information to improve product development and marketing, resulting in increased customer acquisition and retention.
Example 3: Financial Services Firm
A financial services firm implemented a CRM system to manage customer relationships and track financial transactions. They also conducted customer interviews and surveys to gather feedback on their services. By analyzing the feedback, they were able to identify areas for improvement in their customer service and product offerings. This resulted in improved customer satisfaction and loyalty, as well as an increase in referrals and new business.
Overcoming Challenges and Building a Customer-Centric Culture
While the benefits of integrating CRM, marketing, and customer feedback are undeniable, there are also challenges to consider. Successfully navigating these challenges requires a commitment to building a customer-centric culture within your organization.
Common Challenges
- Data Silos: Data silos, where customer data is stored in separate systems, can make it difficult to get a complete view of the customer.
- Lack of Integration: Integrating CRM, marketing, and customer feedback tools can be complex and time-consuming.
- Employee Resistance: Employees may resist adopting new technologies or processes.
- Poor Data Quality: Inaccurate or incomplete data can undermine the effectiveness of your CRM and marketing efforts.
- Lack of Resources: Implementing and maintaining a CRM system and customer feedback initiatives can require significant resources.
Building a Customer-Centric Culture
A customer-centric culture is one where the needs and preferences of customers are at the forefront of every decision. To build a customer-centric culture, you can:
- Prioritize Customer Feedback: Make customer feedback a priority and actively seek it out.
- Empower Employees: Empower your employees to make decisions that benefit customers.
- Foster Collaboration: Encourage collaboration between departments to ensure that everyone is working towards the same goals.
- Invest in Training: Provide your employees with the training and resources they need to succeed.
- Lead by Example: Demonstrate your commitment to customer satisfaction from the top down.
The Future of Customer Engagement: Trends and Predictions
The world of CRM, marketing, and customer feedback is constantly evolving. Here are some trends and predictions for the future:
- Artificial Intelligence (AI): AI will play an increasingly important role in CRM, marketing, and customer service, automating tasks, personalizing experiences, and providing valuable insights.
- Hyper-Personalization: Businesses will continue to strive for hyper-personalization, tailoring their messaging and offers to individual customer preferences and behaviors.
- Omnichannel Customer Experience: Customers will expect a seamless experience across all channels, including email, social media, phone, and in-person interactions.
- Data Privacy and Security: Data privacy and security will become even more important as businesses collect and use more customer data.
- Focus on Customer Loyalty: Businesses will increasingly focus on building customer loyalty and retention, as it is more cost-effective than acquiring new customers.
Conclusion: Embrace the Power of Integration
In conclusion, the integration of CRM, marketing, and customer feedback is essential for achieving sustainable business growth. By embracing this approach, businesses can forge deeper customer connections, optimize their marketing efforts, and gain a competitive edge. The journey may require effort and dedication, but the rewards—increased customer loyalty, improved profitability, and a stronger brand reputation—are well worth it. Start today by assessing your current systems, identifying areas for improvement, and taking the first steps towards a more customer-centric future.
By implementing the strategies outlined in this guide and embracing a customer-centric culture, you can unlock the full potential of your business and achieve unprecedented success. The future of customer engagement is here, and it’s powered by the synergistic force of CRM, marketing, and customer feedback.


