Small Business CRM Demo: See How to Supercharge Your Growth (And Stop Wasting Time!)
Small Business CRM Demo: Your Path to Growth and Efficiency
Running a small business is a wild ride, isn’t it? You’re juggling a million things at once – sales, marketing, customer service, and everything in between. It’s exhilarating, but let’s be honest, it can also be incredibly overwhelming. That’s where a Customer Relationship Management (CRM) system swoops in to save the day. Think of it as your central hub for all things customer-related, a place to organize, analyze, and ultimately, grow your business. And what better way to understand its power than with a compelling small business CRM demo?
This article isn’t just about a demo; it’s about understanding how a CRM can transform your small business. We’ll delve into the core functionalities, explore the benefits, and show you how to choose the right CRM to fit your specific needs. Get ready to unlock the secrets to a more efficient, customer-centric, and ultimately, more profitable business.
What is a CRM and Why Does Your Small Business Need One?
Before we dive into the demo, let’s get the basics straight. A CRM system is more than just a fancy address book. It’s a comprehensive platform designed to manage all your interactions with current and potential customers. It helps you collect, organize, and leverage customer data to improve your sales, marketing, and customer service efforts.
Here’s why your small business absolutely needs a CRM:
- Improved Customer Relationships: A CRM provides a 360-degree view of your customers, allowing you to personalize interactions and build stronger relationships.
- Increased Sales: By tracking leads, managing the sales pipeline, and automating tasks, a CRM helps you close more deals.
- Enhanced Marketing: CRM data empowers you to create targeted marketing campaigns that resonate with your audience.
- Streamlined Customer Service: CRM systems centralize customer information, enabling your team to provide faster and more effective support.
- Data-Driven Decision Making: CRM analytics provide valuable insights into your business performance, helping you make informed decisions.
- Time Savings: Automating repetitive tasks frees up your team to focus on more strategic initiatives.
In essence, a CRM system is your secret weapon for surviving and thriving in today’s competitive market.
Key Features to Look for in a Small Business CRM
Not all CRM systems are created equal. When choosing a CRM for your small business, it’s crucial to select one with the features that align with your specific needs. Here are some essential features to consider:
Contact Management
At its core, a CRM should excel at contact management. This includes storing and organizing contact information, such as names, addresses, phone numbers, email addresses, and social media profiles. You should also be able to segment your contacts based on various criteria, such as demographics, purchase history, and engagement level.
Lead Management
Lead management is the process of tracking and nurturing potential customers. A good CRM allows you to capture leads from various sources, such as website forms, email campaigns, and social media. It should also provide tools for qualifying leads, assigning them to sales representatives, and tracking their progress through the sales pipeline.
Sales Automation
Sales automation features streamline your sales process by automating repetitive tasks, such as sending follow-up emails, scheduling appointments, and creating sales reports. This frees up your sales team to focus on building relationships and closing deals.
Marketing Automation
Marketing automation tools help you create and execute targeted marketing campaigns. This includes features such as email marketing, social media integration, and lead nurturing workflows. Marketing automation saves time, improves efficiency, and helps you reach your target audience with the right message at the right time.
Reporting and Analytics
Reporting and analytics provide valuable insights into your business performance. A good CRM offers customizable reports and dashboards that track key metrics, such as sales revenue, customer acquisition cost, and customer lifetime value. This data helps you make informed decisions and optimize your business strategies.
Customer Service
Many CRM systems include customer service features, such as help desk ticketing, knowledge bases, and live chat integration. These tools enable your team to provide faster and more effective support, improving customer satisfaction and loyalty.
Integration Capabilities
Your CRM should integrate seamlessly with other tools you use, such as email marketing platforms, accounting software, and social media channels. This ensures that data flows smoothly between systems, eliminating manual data entry and reducing errors.
Mobile Accessibility
In today’s fast-paced world, it’s essential to have access to your CRM data on the go. Look for a CRM that offers a mobile app or a mobile-friendly interface, allowing your team to access information and update records from anywhere.
The Benefits of a Small Business CRM: Beyond the Basics
While the core features are essential, the benefits of a CRM extend far beyond the basics. Here’s a deeper dive into how a CRM can transform your small business:
Improved Customer Satisfaction and Loyalty
A CRM helps you understand your customers better, allowing you to personalize interactions and provide exceptional customer service. When customers feel valued and understood, they are more likely to become loyal advocates for your brand. This leads to repeat business, positive word-of-mouth referrals, and a stronger brand reputation.
Increased Sales and Revenue
By streamlining your sales process, automating tasks, and providing valuable insights into your leads and opportunities, a CRM can significantly boost your sales. Features like lead scoring, sales pipeline management, and automated follow-ups help your sales team close more deals and generate more revenue. You can also identify upselling and cross-selling opportunities to maximize revenue from existing customers.
Enhanced Marketing Effectiveness
A CRM provides valuable data about your customers, allowing you to create targeted marketing campaigns that resonate with your audience. You can segment your customer base, personalize your messaging, and track the performance of your campaigns to optimize your marketing efforts and maximize your return on investment. Email marketing, social media integration, and lead nurturing workflows are key components of an effective marketing strategy driven by a CRM.
Better Team Collaboration
A CRM acts as a central hub for all customer-related information, making it easier for your team to collaborate and share knowledge. Sales, marketing, and customer service teams can access the same information, ensuring everyone is on the same page. This leads to improved communication, reduced errors, and a more efficient workflow.
Data-Driven Decision Making
CRM analytics provide valuable insights into your business performance, helping you make informed decisions. You can track key metrics, identify trends, and measure the effectiveness of your strategies. This data-driven approach allows you to optimize your operations, improve your customer relationships, and drive sustainable growth.
Time and Cost Savings
By automating repetitive tasks and streamlining your processes, a CRM saves your team valuable time. This allows them to focus on more strategic initiatives, such as building relationships with customers and closing deals. The efficiency gains translate to cost savings, as you can do more with less. You can also reduce errors and improve accuracy by automating tasks, leading to further cost savings.
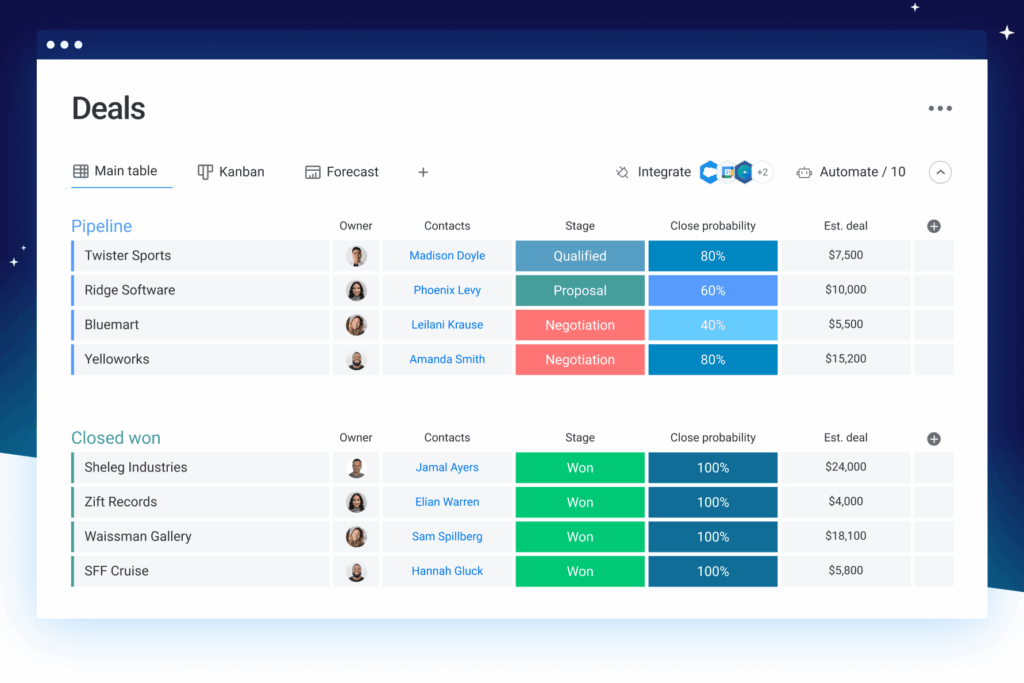
Small Business CRM Demo: Let’s Get Practical
Now, let’s get to the good stuff! We’ll take a look at a hypothetical small business CRM demo. Keep in mind that the specific features and interface will vary depending on the CRM you choose, but the core functionalities remain consistent.
Imagine you’re the owner of a small online boutique selling handcrafted jewelry. You’re using a CRM to manage your customer relationships, sales, and marketing efforts.
1. Contact Management: Your Customer Database
The demo starts with the contact management section. You can easily add new contacts, importing them from a spreadsheet or manually entering their details. Each contact record includes:
- Contact Information: Name, email address, phone number, mailing address.
- Social Media Profiles: Links to their social media accounts.
- Purchase History: A detailed record of their past purchases.
- Communication History: All emails, calls, and interactions with the customer.
- Segmentation Tags: Tags like “VIP Customer,” “Interested in Necklaces,” or “First-Time Buyer.”
This detailed view of your customers allows you to personalize your interactions and offer tailored recommendations.
2. Lead Management: Nurturing Potential Customers
Next, you’ll explore the lead management section. Let’s say a potential customer, Sarah, signs up for your newsletter through your website. The CRM automatically captures her information and creates a lead record. The lead management process might include:
- Lead Scoring: The CRM assigns a score to Sarah based on her activity (e.g., opening emails, visiting your website).
- Lead Assignment: The lead is automatically assigned to a sales representative.
- Nurturing Workflow: The CRM triggers a series of automated emails, providing Sarah with information about your products and special offers.
- Sales Pipeline: Sarah’s lead is tracked through the sales pipeline, from initial contact to potential purchase.
This automated process helps you nurture leads, convert them into customers, and track their progress through the sales cycle.
3. Sales Automation: Streamlining Your Sales Process
Now, let’s delve into sales automation. Imagine you’re about to send a follow-up email to a prospect who expressed interest in a specific necklace. The CRM allows you to:
- Create Email Templates: Pre-designed email templates save you time and ensure consistent messaging.
- Automate Follow-ups: Schedule follow-up emails to be sent automatically at specific intervals.
- Track Email Open Rates and Clicks: Monitor the performance of your emails and identify which ones are most effective.
- Automate Task Creation: Automatically create tasks for yourself or your team members, such as scheduling a phone call or sending a proposal.
These automation features free up your sales team to focus on building relationships and closing deals.
4. Marketing Automation: Reaching Your Audience Effectively
Let’s see how marketing automation can help. You decide to launch a special promotion for your “Summer Collection.” Using the CRM, you can:
- Segment Your Audience: Create a segment of customers who have purchased necklaces in the past.
- Design an Email Campaign: Create an email campaign showcasing the new collection.
- Schedule the Campaign: Schedule the campaign to be sent to your segmented audience.
- Track Campaign Performance: Monitor the open rates, click-through rates, and conversions of your campaign.
This allows you to deliver targeted messages to the right customers at the right time, maximizing your marketing ROI.
5. Reporting and Analytics: Making Data-Driven Decisions
Finally, let’s explore the reporting and analytics section. The CRM provides you with a dashboard that displays key metrics, such as:
- Sales Revenue: Track your total sales revenue over time.
- Lead Conversion Rate: Measure the percentage of leads that convert into customers.
- Customer Acquisition Cost: Calculate the cost of acquiring a new customer.
- Customer Lifetime Value: Estimate the total revenue you can expect from a customer over their relationship with your business.
These insights help you understand your business performance, identify areas for improvement, and make data-driven decisions to drive growth.
Choosing the Right CRM for Your Small Business
Now that you’ve seen a demo and understand the benefits, how do you choose the right CRM for your small business? Here’s a step-by-step guide:
1. Assess Your Needs and Goals
Before you start shopping, take the time to understand your specific needs and goals. What are your biggest challenges? What do you want to achieve with a CRM? Consider the following questions:
- What are your pain points? (e.g., difficulty managing leads, lack of customer insights, inefficient sales processes)
- What are your sales and marketing goals? (e.g., increase sales revenue, improve customer retention, generate more leads)
- What features are essential? (e.g., contact management, lead management, sales automation, marketing automation)
- How many users will need access to the CRM?
- What integrations do you need? (e.g., email marketing, accounting software, social media)
Answering these questions will help you create a clear picture of your requirements and narrow down your options.
2. Research CRM Providers
Once you know what you’re looking for, it’s time to research CRM providers. There are many options available, so it’s important to compare features, pricing, and reviews. Consider the following factors:
- Reputation and Reviews: Read reviews from other small businesses to get an idea of the CRM’s strengths and weaknesses.
- Pricing: Compare pricing plans and ensure they fit within your budget.
- Features: Make sure the CRM offers the features you need.
- Ease of Use: Look for a CRM that is user-friendly and easy to navigate.
- Customer Support: Check the provider’s customer support options and reputation.
- Scalability: Choose a CRM that can grow with your business.
Some popular CRM options for small businesses include:
- HubSpot CRM: A free CRM with robust features for sales and marketing.
- Zoho CRM: A feature-rich CRM with affordable pricing plans.
- Salesforce Sales Cloud: A powerful CRM with a wide range of features, suitable for larger small businesses.
- Pipedrive: A sales-focused CRM designed for small businesses.
- Freshsales: A CRM with a focus on conversational sales.
3. Request Demos and Trials
Once you’ve narrowed down your list of potential CRM providers, request demos and free trials. This will allow you to see the CRM in action and experience its features firsthand. During the demo, ask questions and explore the functionalities that are most important to you. The demo is your opportunity to see if the CRM is a good fit for your business.
4. Consider Integration Capabilities
As mentioned before, integration is crucial. Does the CRM seamlessly integrate with the other tools you already use? Check for native integrations or the availability of APIs to connect to other systems.
5. Plan for Implementation and Training
Implementing a CRM requires planning and preparation. Consider the following steps:
- Data Migration: Plan how you will migrate your existing customer data into the CRM.
- Customization: Customize the CRM to fit your specific needs.
- Training: Train your team on how to use the CRM effectively.
- Ongoing Support: Ensure you have access to ongoing support from the CRM provider.
A well-planned implementation will ensure a smooth transition and maximize the benefits of your CRM.
Overcoming Common CRM Implementation Challenges
While a CRM can be a game-changer for your small business, implementing one can come with its own set of challenges. Let’s explore some common hurdles and how to overcome them:
1. Data Migration Challenges
Migrating data from existing spreadsheets or legacy systems can be time-consuming and complex. Common issues include data quality problems, formatting inconsistencies, and the sheer volume of information. To mitigate these challenges:
- Clean Your Data: Before migrating, cleanse and standardize your data to ensure accuracy.
- Map Your Fields: Carefully map your existing data fields to the corresponding fields in the CRM.
- Test Your Migration: Run a test migration to identify and resolve any issues before migrating all of your data.
- Consider Using a Migration Tool: Some CRM providers offer data migration tools to simplify the process.
2. User Adoption Issues
Getting your team to embrace a new CRM can be a challenge. Resistance to change, lack of training, and a perception of complexity can hinder user adoption. To boost user adoption:
- Provide Adequate Training: Offer comprehensive training to all users to ensure they understand how to use the CRM effectively.
- Highlight the Benefits: Explain the benefits of the CRM and how it will make their jobs easier.
- Get Buy-In from Key Users: Involve key users in the implementation process and seek their feedback.
- Provide Ongoing Support: Offer ongoing support and answer any questions users may have.
- Make it User-Friendly: Choose a CRM that is easy to use and navigate.
3. Customization Issues
Customizing a CRM to fit your specific needs can be time-consuming and require technical expertise. To overcome customization challenges:
- Start Simple: Focus on customizing the essential features first.
- Follow Best Practices: Adhere to best practices for customization.
- Seek Expert Help: If you lack the technical expertise, consider hiring a CRM consultant.
- Plan for Future Customization: Design the CRM with future customization in mind.
4. Integration Challenges
Integrating your CRM with other systems can be technically challenging. To address integration challenges:
- Choose a CRM with Strong Integration Capabilities: Look for a CRM that offers native integrations with the tools you use.
- Use APIs: If native integrations are not available, use APIs to connect to other systems.
- Test Your Integrations: Thoroughly test your integrations to ensure that data flows smoothly between systems.
- Seek Expert Help: If you encounter any difficulties, seek help from a CRM consultant.
Maximizing Your CRM Investment: Tips for Success
Once you’ve implemented your CRM, it’s essential to optimize its use to maximize your investment. Here are some tips for success:
1. Regularly Review and Update Your Data
Keep your CRM data clean and up-to-date. Regularly review your contact records, update information, and remove any duplicates or outdated entries. This ensures that your data is accurate and reliable.
2. Train Your Team Continuously
Provide ongoing training to your team to ensure they stay up-to-date on the latest features and best practices. Encourage them to ask questions and seek help when needed. Regular training helps your team use the CRM effectively and maximizes its benefits.
3. Use the CRM Actively
Encourage your team to use the CRM on a daily basis. Make it a central part of your business operations. The more actively your team uses the CRM, the more value you will get from it.
4. Track Key Metrics
Monitor key metrics to track the performance of your CRM and identify areas for improvement. Use the reporting and analytics features to gain insights into your sales, marketing, and customer service efforts. This data-driven approach allows you to optimize your strategies and drive growth.
5. Seek Feedback and Make Adjustments
Gather feedback from your team and make adjustments to your CRM implementation as needed. Listen to their suggestions and address any issues they may be experiencing. Regularly review your CRM setup and make changes to optimize its performance.
The Future of CRM for Small Businesses
The CRM landscape is constantly evolving, with new technologies and trends emerging. Here are some trends to watch for in the future:
1. Artificial Intelligence (AI)
AI is playing an increasingly important role in CRM. AI-powered CRM systems can automate tasks, provide personalized recommendations, and predict customer behavior. AI can help you improve your sales, marketing, and customer service efforts.
2. Mobile CRM
Mobile CRM is becoming increasingly important. With mobile CRM, your team can access CRM data and update records from anywhere. This improves efficiency and enables your team to stay connected with customers on the go.
3. Social CRM
Social CRM integrates social media with your CRM system. This allows you to track social media interactions, monitor brand mentions, and engage with customers on social media. Social CRM helps you build stronger relationships with your customers and improve your brand reputation.
4. Personalization
Personalization is becoming increasingly important in CRM. Customers expect personalized experiences, and CRM systems are enabling businesses to deliver them. Personalization can improve customer satisfaction, loyalty, and sales.
5. Integration with Other Technologies
CRM systems are integrating with other technologies, such as marketing automation platforms, e-commerce platforms, and customer service tools. This integration allows businesses to streamline their operations and improve their customer relationships.
Conclusion: Embrace the Power of CRM
A small business CRM is no longer a luxury; it’s a necessity. It’s your key to unlocking growth, improving efficiency, and building stronger customer relationships. By understanding the features, benefits, and implementation process, you can choose the right CRM for your business and transform your operations. Remember to focus on your needs, research your options, and embrace the power of a CRM to take your small business to the next level. Don’t be left behind – embrace the future of customer relationship management and watch your business thrive!


